
Saturday, February 26, 2011
52 Projects: The Kitchen Shelf
We finished a remodel of our kitchen 2 years ago. We've yet to put anything up on the walls etc (e.g. pictures). I put up a shelf to reduce the clutter on the counter. Small and insignificant I know but hey - it's a project. Who know's I might even put a picture or two behind it soon...
Sunday, February 20, 2011
52 Projects: Garden Bed Prep
This weeks project wasn't a load of fun. It was too nice to build a new floor mat for my office - had to be outside. It was cold but that was a good thing. My project was to dig up the garden bed to prepare for planting. I dug both the old one (which was easy) and the new one (which wasn't).
I live on glacial moraine. That is the crap left over when the glacier retreats. Not the good soil mind you but basically the rocks and clay. To garden I've got to loosen up the moraine, break it up, put in top soil, and compost. The first step is loosening up the soil. I use a shovel (and at times an adze/pick combo made for breaking up concrete). It's like digging rocks. This is compounded by whoever was the developer for our neighborhood. S/he basically used my yard to dump concrete waste and the stuff he excavated from other homes in the area. I've got double the rocks. And concrete. And old nails.
Last year I dug up the what is now, the old bed. I then spent the whole summer trying to remove rocks and put down top soil while growing my garden. I will say there are fewer rocks this year. The new bed is a different story - it's like the old bed was last year. Thought I was going to break the tip of my shovel. So I'm done sweating and whining for a bit. Here are the pics:
Upper bed before.

Upper bead after. I know - doesn't look much different. The plants appreciate it.

I tried using this beast but the shovel was more efficient.

From a few weeks ago here's the before picture of the second bed.

And here are the after shots.


It still needs a raking and top soil - give me a week. Off to stretch out and then a soak in the hot tub.
Saturday, February 12, 2011
52 Projects: Give Me Some Space
Dawkins is a cheap PC I bought years ago to act as a server. It’s been chugging along uninterrupted under my desk for quite a while (like 5 years). It runs the CentOS version of linux doing multiple duties including acting as a:


Here’s the problem
As the picture shows Dawkins is running out of hard disk space. My experience (and Dawkins is just reaffirming this) is that when linux machines get low on hard disk space performance degrades. Disk swapping etc I guess. So it’s time for an upgrade.

What kind of drive do I need?
This is an old beast. I don’t believe this has very advanced drives so the best way to approach this is to shut Dawkins down, open it up, and see what’s there. The shutdown command in linux with the -h (halt) option should do the trick: shutdown -h now
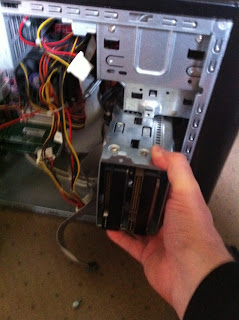
Ewwe - Dawkins is dusty inside. Lets take him out and dust him off (I learned long ago not to blow the dust out of a PC indoors…well OK not that long ago).

Now I need to get the old drive out to see what kind it is. A Barracuda 7200 160GB drive! State of the art in 2004. We’ll get something bigger and just leave this as the boot disk.

A little more background research…
But before I do that it’s been years since I’ve done admin work on a linux machine - I need to figure out how to find and make the drive accessible once I get it in. A little internet research is in order.
One of the really nice things about linux is the community of folks that will help you with stuff. A quick google search on “Adding a Drive to a linux system” turned up this site which provides exactly what I’m looking for (it seems anyway).
Off to InfoTech
Infotech is a great local computer store. They’ve got everything a geek (and post-geek like me) could want at reasonable prices. I found this 500gb WD Caviar drive for $80.

Restarting Dawkins
The moment of truth


Changing scripts etc to take advantage of this new space.
The last step was simply to adjust some scripts I had to take advantage of the new space. When backups are done I want the files stored on the new big drive. Didn’t take long and to be honest your situtation will not be the same as mine so it really wasn’t worth going into detail about.
That’s it for this week. I’ve got several ideas for next week depending on the weather and my mood. I have to start prep on the Garden and the picture below is my office floor mat (you’ll notice it’s breaking up). I was walking through Costco the other day and saw some bamboo flooring that was pretty cheap - I wonder if I can make my own floor mat?

- file server for my family
- server to backup my work server (a cloud based server)
- streaming media server
- development platform for me for web development when I feel the need to be geeky


Lately Dawkins has been slowing down - I think there's a problem.
Here’s the problem
As the picture shows Dawkins is running out of hard disk space. My experience (and Dawkins is just reaffirming this) is that when linux machines get low on hard disk space performance degrades. Disk swapping etc I guess. So it’s time for an upgrade.

This is an old beast. I don’t believe this has very advanced drives so the best way to approach this is to shut Dawkins down, open it up, and see what’s there. The shutdown command in linux with the -h (halt) option should do the trick: shutdown -h now
Ewwe - Dawkins is dusty inside. Lets take him out and dust him off (I learned long ago not to blow the dust out of a PC indoors…well OK not that long ago).
Now I need to get the old drive out to see what kind it is. A Barracuda 7200 160GB drive! State of the art in 2004. We’ll get something bigger and just leave this as the boot disk.

But before I do that it’s been years since I’ve done admin work on a linux machine - I need to figure out how to find and make the drive accessible once I get it in. A little internet research is in order.
One of the really nice things about linux is the community of folks that will help you with stuff. A quick google search on “Adding a Drive to a linux system” turned up this site which provides exactly what I’m looking for (it seems anyway).
Off to InfoTech
Infotech is a great local computer store. They’ve got everything a geek (and post-geek like me) could want at reasonable prices. I found this 500gb WD Caviar drive for $80.

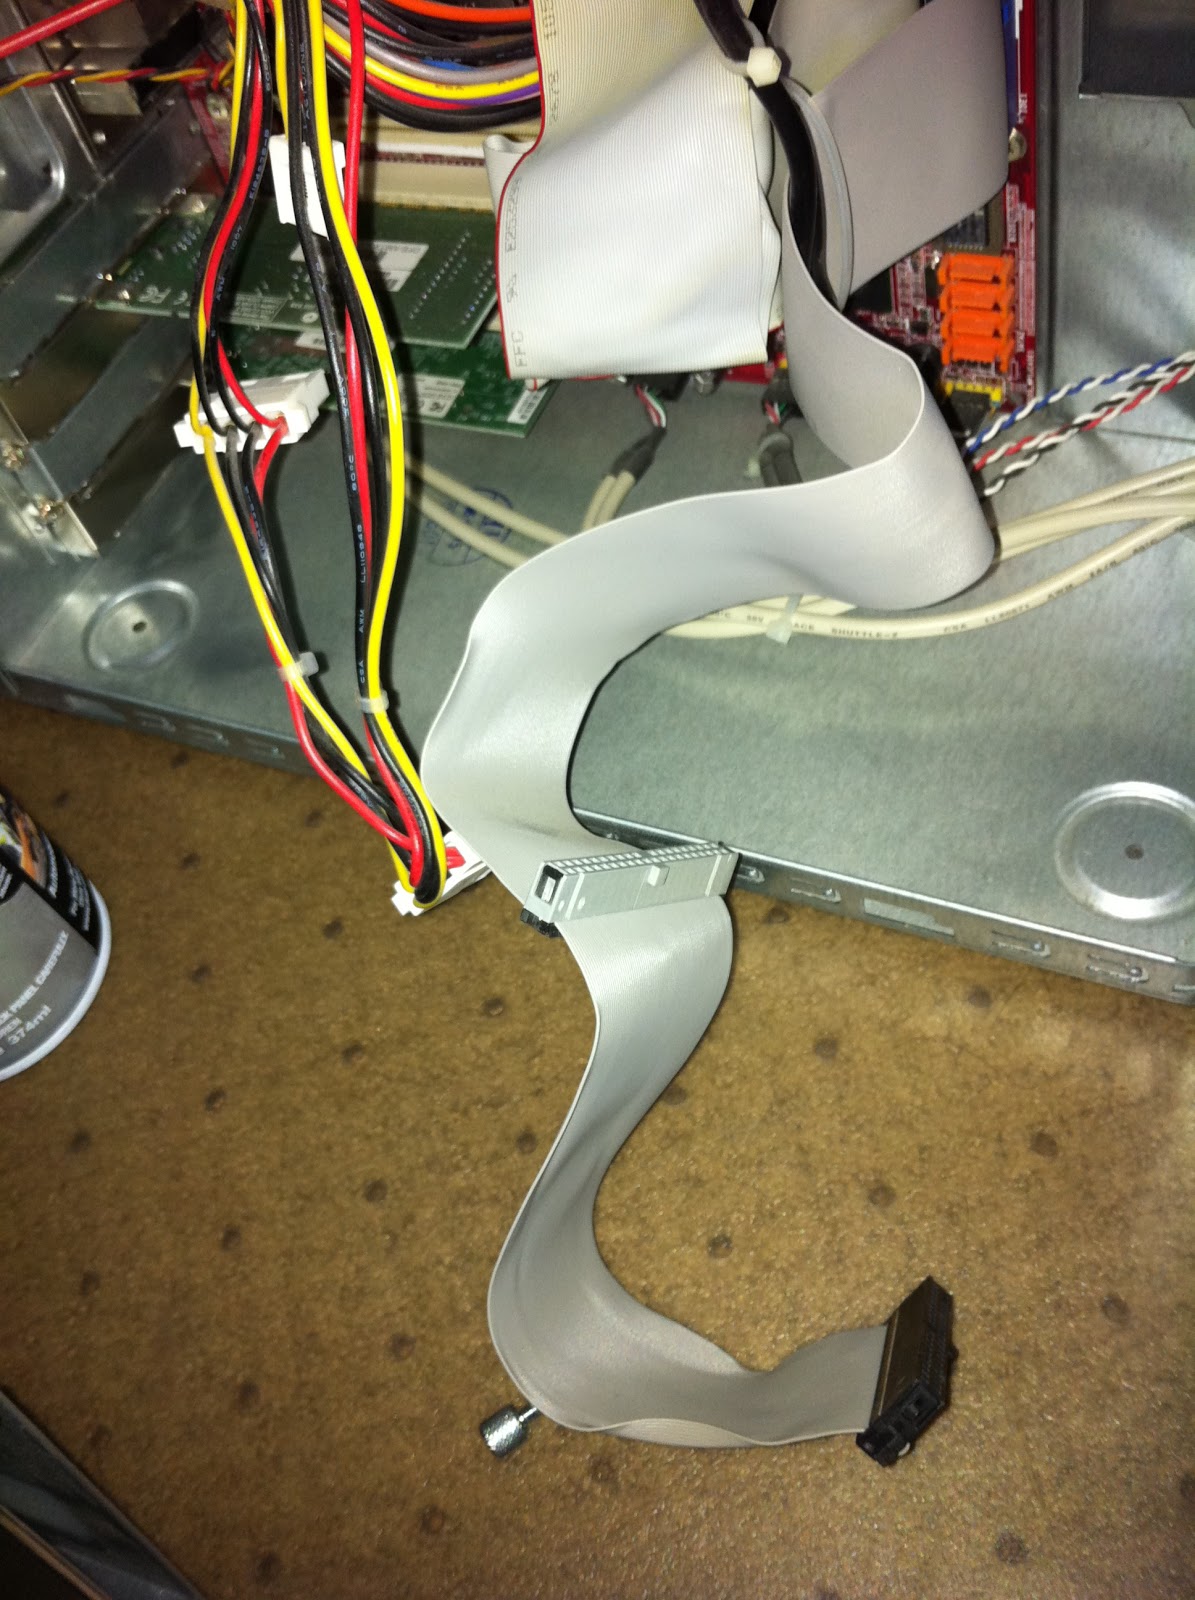
Installing the drive
Drive installation was pretty easy. Just screw it in and attach the cables (power and data). I’ll let the pics speak for themselves. Only issue was making sure the jumpers on both drives were set appropriately. One had to be the master and the other the slave. I dug up the manuals on-line and set them appropriately. You use these little bits of plastic that are easily lost to set the role of the drive.


The moment of truth

Mounting the drive (permanently)
I followed the instructions above mostly. Only thing that didn’t work was setting the drive as an extended partition - it wouldn’t format if I did that. Googling around I found that if I set it to be a primary partition it all would work. Sure enough it did. I honestly don’t know the difference between extended and primary and I really don’t care. I’ve got 500 gig’s of extra space on my server!

The last step was simply to adjust some scripts I had to take advantage of the new space. When backups are done I want the files stored on the new big drive. Didn’t take long and to be honest your situtation will not be the same as mine so it really wasn’t worth going into detail about.
That’s it for this week. I’ve got several ideas for next week depending on the weather and my mood. I have to start prep on the Garden and the picture below is my office floor mat (you’ll notice it’s breaking up). I was walking through Costco the other day and saw some bamboo flooring that was pretty cheap - I wonder if I can make my own floor mat?

Sunday, February 6, 2011
52 Projects: The 2011 Garden Plan
We'd finished our patio and putting in some tiers in our steep backyard in the late winter of 2009-2010. We still have more tiers to build on the other half of our hill...but there were enough. I wanted to do something with the tier space.
My grandfather gardened and put up veggies for a family of 15 in his 20 by 40 foot backyard plot in downtown Trenton, New Jersey. He'd have at least 3 harvests a year and end up with figs, tomatoes, peppers, oranges (yes he had an orange tree in Trenton), tons of greens, squashes of all shapes and colors, onions, and even potatoes. I remember being in awe of the neat rows of tidy bushes of all sizes and colors. He maximized use of every square inch of his backyard.
So last year I tried my first garden in twenty-five years. Previous attempts had been mostly failure but that was due to my laziness (I never weeded) more than anything else.
In March (of 2010) I ran to Fred Meyer's and bought about $100 worth of seeds (a real hodge podge of stuff) just to see what might grow. I was pretty careful to document what I bought and what happened with each variety of seed. I started a notebook and numbered each seed packet so I could track everything about my new garden. I planted indoors early and guess what? The winter of 2010 held on and on and on and my indoor plants (most of them) fizzled out.
Sometime in late March (after I'd planted by indoor seeds) I found this book at Costco:

It discussed the unique climate I live in (Pacific Northwest), what works and what doesn't, and most importantly gave a city boy like me a clue about the importance of having a plan, planting schedules, weeding, cultivating the harvest, and soil preparation. It created a real scramble for me (soil preparation - what's that?) and eventually I did get a decent garden out of 2010 but...well lets just say I learned a lot and could have done a lot better if I'd known 1/10 of what this book contains. I wasn't going to be able to recreate my grandfathers garden in the pacific northwest but is is feasible to have a low maintenance garden that keeps you in greens (and even gives you some canning veggies) for five months a year.
This year is going to be different - I'm now a 2nd year amateur farmer and as part of my list of projects I've divided the garden up into (at least) 4 projects to write about: Planning, Preparation, Planting, and Maintaining. This entry is about the first of those 4 projects: Planning.
The first step was to take inventory of last years seed. Seeds can last several years if stored properly. I'd carefully packed stuff up in a plastic bag, put a desiccant in the pack (moisture kills seed life) and stored it in the cool of my shed (heat is likewise not a friend of seed life). Yesterday I dug out my notebook with the carefully scribed diary of the garden and headed off to the shed to pull out the seeds.

Aw Rats! Literally. Rats had gotten into my seed packets and destroyed everything. I couldn't tell bush beans from radish seed. They'd even eaten the desiccant. Lesson learned 1 & 2: Write down the seed variety in addition to numbering the packets AND store the seeds in a sealable metal container.
I have to start somewhere else. Gonna measure the tiers and build a template to lay out the garden. I'm doing a few things differently this year. First I'm expanding. I restricted myself to one tier last year (one of the few smart things I did). One tier was a manageable space in which to learn and experiment but yet provided me with the reinforcement of a real yield. This year I'm going to use the patio flower box for some herbs and expand to the second of three tiers. I'll leave the third tier fallow this year - I intend to rotate tiers every 3 years.
Here's the flower box - we'll plan herbs first and Fran will fill the front edge with some flowers. She does the artsy stuff - I'm into the meat and potatoes.

Here's the tier I "farmed" last year (lovingly titled "tier 1"). It's primed and ready to go. We even did winter prep on the bed. That's Fran in the picture. Looks like I need to power wash the retaining wall - another project.

And here's the new tier ("tier 2"). Tier 2 is much wider than tier 1 and there's room for 2 beds.

I've got to get the cap rail on my tiers this year (yet another project). This one I probably should have done some fall prep work on. Sigh - the 20/20 hind site of a year 2 amateur farmer.
We measured up the tiers (and flower box), found some graph paper, and I came up with this template:

I was able to reconstruct most seed varieties from notes I took last year. Here's what worked for me last year:
Herbs:
- Tyme
- Chives
- Italian parsley
- Basil
- Mint
Salad Stuff:
- Butterhead lettuce
- Romain
- Arugula
- Mesculin
- Spinach
- Fennel
- Leeks
Tomatoes (I over crowded tomatoes and let them get too bushy - will give space but trim this year):
- Heirloom
- Romas (best canning and sauce tomatoes EVER!)
- Gold Nugget Cherry
- Red Cherry
- Beefstake
- Brandywine
Squash:
- Creekneck
- Yellow
- Spagetti
- Zucchini (who can't grow this)
- Cucumbers (OK not a squash)
Vining Things:
- Sugarsnap Peas (we love peas)
- Green Beans
Here's what didn't grow: Peppers of any kind - I don't know why - I tried bell, habanero, seranno, pablano, and jalapeno's. Nada, zip, nothing. My neighbor got some great hot wax peppers and bell peppers so it's not the soil - it must be something about me. I also did corn which worked but I felt pretty silly taking up 20 square feet of garden for 20 ears when I can buy it at 10/1$ at the height of the season at the local farmers market. We'll let someone else to grow our corn this year.
Here's what I don't know: Rosemary, sage, and oregano. I'd planted them on the edge of the garden and Fran accidentally weeded out my young plants. Oops.
I made a pretty beginner mistake last year. I way overcrowded things. Not this year. Plenty of space. Here's the basic plan:

It includes the veggies mentioned above with the addition of fava beans and some experimental greens (mustard, cale and cabbage are my thoughts right now). I've also got an experimental section (lower left above) that I might try some heirloom carrots - depends on the quality of seeds I can find. We're doing mint in a separate pot because it's a weed and will take over everything.
This is a La Nina year. It's supposed to be cold in the northwest. It's not. It's actually be relatively dry and moderate. Given that here's my tentative plan:
Late February
Indoors - do some cabbage and start my herbs
Sow peas, favas and spinach
March
Mustard (and any other asian greens) and chives
Indoors - tomatoes (all varieties),
Late March - more peas and green beans
April
Transplant herbs
Indoors - start fennel, and squash (including cucumbers)
Late - Leeks, Carrots
May
Lettuce
Transplant tomatoes, squash, fennel (probably late in the month)
This may vary based on the forecast but it is the plan at the moment. In June, July and even early August I'll put in more lettuce, other greens, peas just so I have them all summer long. I may come up with a more rigorous planting schedule but (year 2 amateur speaking) I think having a flexible schedule and basing plantings on the actual weather will work out better than trying to be too rigorous a planner.
I'll of course keep a journal of specific seed varieties and how things go. I'll also update this site with progress. I'm off to order seeds (on-line) now...I've been told I can get better seed quality on-line than I can at the Fred Meyer garden center store.
Saturday, January 29, 2011
52 Projects: Dimmer Switch
Not that long ago we finished a complete remodel of our house. Our general contractor was a great guy and I'd recommend him to anyone. Efficient, value driven, and a real craftsman. The only issue was he was sometimes overly pragmatic in the name of saving money. More specifically we wanted a dimmer switch in our closet and he wouldn't do it.
Let me explain why we wanted this. I work weird hours. I often wake up in the middle of the night to catch a plane or sometimes I work until wee hours of the morning. Our closet is directly off our bedroom. When I turn on the light I almost always wake up my wife. Not to mention me being blinded by two 120 watt bulbs in the closet (we wanted the high wattage because the closet has no natural light). So when we remodeled we asked the contractor to put in a dimmer switch in the closet. That said I really didn't explain why and so - being the frugal guy he is - he just put in a standard switch. As the closet and our bedroom were the last things being remodeled and I'd gotten used to him by then I decided it just wasn't worth the hassle to explain everything. Those of you that have remodeled know how tired you get of dealing with details (not my strong suit to begin with). Besides putting in a dimmer is easy right?
Here's where I started:

The next step was a quick run to home depot for purchase of the dimmer switch.

All the parts are there! Yahoo! The instructions contain sage advice. I definitely want to avoid death at all costs. Off to the basement to turn off the power:


Out with the old.


And in with the...wait a minute - the old wasn't grounded! I'm no electrician but I know this is "bad". No biggie lets just tap into the ground wire. So lets just check the instructions just to make sure we install this correctly. Hey wait...


The instructions say hook the first black dimmer lead to any wire removed from the old switch. Then hook the second black dimmer lead to the other wire. But there's only one black lead on the new switch. What???? I suspect this is why many people hire electricians - to figure out crappy directions. I'm gonna guess that I simply use the RED lead in place of the "second black dimmer lead".
I put it together using provided wire nuts:

Time for a test. Head back down stairs and throw the switch:

TA DA! It works.

Just a bit of finishing and cleaning up:


Tools/parts used:

That's it for now. 48 more to go.
Monday, January 17, 2011
52 Projects: Asiago Bread
Don't Panic! I'm not turing this into a cooking blog. I am a foodie and enjoy cooking but there are so many good cooking/foodie blogs out there I and my skills are so limited I just can't see contributing anything meaningful to the space.
That said every once in a while you stumble on/create a recipe so phenomenal you've just got to share it.
Last week I was having a craving for home made bread. I pulled out and dusted off the old bread machine. I tried 3 different recipes: the manufacturers, one from Julia Child's "Baking with Julia" cookbook, and one from the internet. All were less than stellar. They were soft and mushy and tasted of wet flour. Just not very good.
I asked around and one of my staff pointed me to this no-knead recipe from the NY times. Apparently among foodies this is the "go to" home made bread and was quite a meme for a while. I've got to get out more, I'd never heard of this.
This made significantly better bread than the bread machine (which is back collecting dust in the closet) but still not quite what I wanted. Further the loaf ended up being a bit small for my family. So my project was to figure out how to make this loaf bigger and better.
When cooking I find there are universally three ingredients that make any recipe better: Cheese, bacon, and beer. Now as much as I like bacon I've never heard of "bacon bread" (but I reserve the right to try that another day). But beer and cheese seemed like a strong combination. I thought if I replaced some or all of the liquid from NY times recipe with beer and threw in some cheese I might have a winner.
So some lessons from about 10 iterations.
Beer: Don't use only beer in the recipe. It doesn't work. The bread barely rose and it ended up tough and beery. My second iteration on the recipe used about 1/4 beer and 3/4 water (filtered - I didn't try tap water). It worked perfectly and gave the bread a tangier taste than water alone.
Cheese: Mild cheese becomes tasteless. Soft cheese separates leaving oily spots in the bread (so much for pepper jack bread). I finally settled on asiago though I suspect a good hard aged cheddar would work. Costco has both a hard asiago and an aged cheddar. Next loaf will be a cheddar beer bread.
I also varied the process a bit from the NY times recipe. I found if I mixed the cheese in when I made the dough it kept the bread from rising. So I made the recipe according to the article (with the exception of 1/4 beer in the liquid mix and changing the quantities - see below) but before the second rise (step 3 in the recipe) I put in about a cup of grated asiago and kneaded it into the dough. I flattened the dough, sprinkled it with some cheese, folded it over, and repeated the process until all the cheese was gone. This probably took 8 to 10 folds - I think this light kneading may actually have helped the recipe. I kept an extra 1/4 cup of cheese that I sprinkled on the top just before baking.
So here are the quantities and pic's from my process
Ingredients:
18 ounces of flour (about 3 and 2/3 cups - though I weigh it on a scale)
1/2 teaspoon rapid-rise yeast (I did not use instant yeast)
2 teaspoons salt
8 ounces filtered water
4 ounces beer (I used a mild beer here - I want to try it with a stout and cheddar)
1 1/4 cup asiago cheese
1/2 teaspoon rapid-rise yeast (I did not use instant yeast)
2 teaspoons salt
8 ounces filtered water
4 ounces beer (I used a mild beer here - I want to try it with a stout and cheddar)
1 1/4 cup asiago cheese
 I also read from cooks illustrated that using a bit (like a tablespoon) of vinegar will improve the taste but I haven't tried it yet.
Steps:
The first step was basically measuring out and mixing the first five ingredients together. I mixed the dry ingredients thoroughly in a large bowl and then put in the liquid. The only issue I found was I only used about a third of the bottle of beer - if only I could think of something to do with the rest...


I then covered the bowl containing the dough with plastic wrap and let it sit overnight (I let it sit 12 hours).
 I removed the dough from the bowl and flattened it out. I then sprinkled a handful of the asiago, folded the dough, and repeated the process until I'd used 1 cup of the asiago.

I put the dough on parchment paper (made it easier to put in the pot at the end) and let it rise for a few hours.
 I preheated the over to 450 (as the recipe calls for) and stuck my #24 le creuset "round french oven" in. This is about a 4.5 quart enameled dutch oven. In about 30 minutes I (carefully) pulled out the hot french oven and put my dough in it. Note just put the parchment paper and dough in together - it's just easier (a trick I picked up from cooks illustrated magazine).
 I slashed the top of the dough, sprinkled it with the remaining cheese, put the hot lid on, and popped it back in the oven. Following the instructions from the NY times I left it in the oven with the lid on for 30 minutes, I think because I made a bigger loaf, that I'll try 35 to 40 minutes next time. After the 30 minutes I took the lid off and let it go another 30 minutes (again I might increase this next time) until it was brown and sounded hollow when thumped.
I pulled it out and let it cool. We're waiting on dinner right now to cut and eat it.

Subscribe to:
Posts (Atom)